Auditing File & Folder Access on Windows with Local Security Policy
· 5 min read

Working as a SOC Analyst for the summer, I’ve stumbled across a plethora of instances in which my coworkers and I would have benefited from a history of previous file and folder modifications. These instances vary per client, however mostly center around files and folders that are seen in our logs but are no longer in the directory identified. They can be either deleted by the system or modified purposely or unknowingly by a user, and if you have no record of where they went you may find yourself struggling to find it again, praying to the Cybergods for mercy. 😦
After some preliminary research, I was able to determine that a Security log in Windows Event Viewer with Event ID 4663 had exactly what I was looking for. However, this Event ID is not enabled by default. To see this log, you need an Administrator to change the Local Security Policy on the machine OR create a new Group Policy Object (GPO) for file auditing. When dealing with multiple endpoints, like multiple file servers, creating a GPO would be the right way to go. However, for the purpose of this post we will be dealing with one specific endpoint, so we will be adjusting the Local Security Policy on the machine instead. This post talks about the steps to enable this process, and the benefits that come with seeing these new logs.
Requirements
- Windows 8, 10
- Windows Server 2008 R2, 2012 R2, 2016
Enabling Event ID 4663
Adjusting the Local Security Policy on a machine is essentially the same as adjusting Group Policy; the former is local (pertaining to one endpoint) while the latter is global (pertaining to “all” endpoints). Local Security Policies are also sometimes referred to as Local Group Policy Objects.
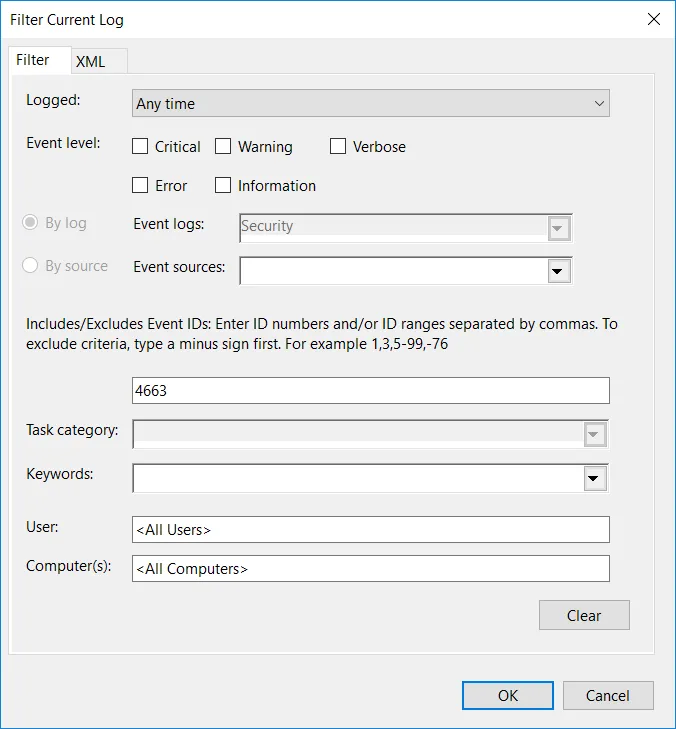
For the sake of clarity, first navigate to Event Viewer. Then navigate to Windows Logs –> Security. After, look to the far right pane for “Filter Current Log,” and then filter by “4663” as shown below.
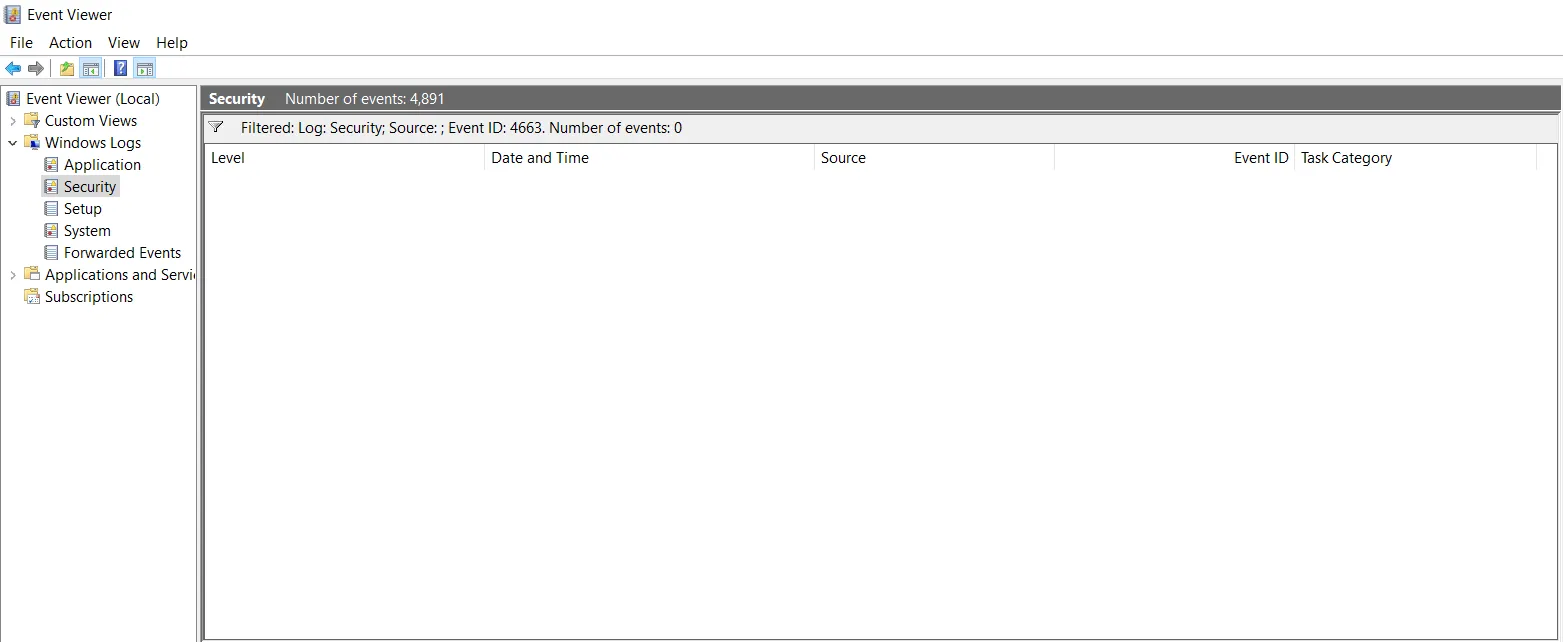
Your window should match mine below. If it does not, and you are seeing log results, then congratulations! You are already gathering the logs necessary to do simple file and folder auditing.
For the less fortunate readers, you are stuck with me for now. To get these logs to appear, we next need to edit our local policy. Go ahead and type in your Windows search bar “Local Security Policy” and open the associated application.
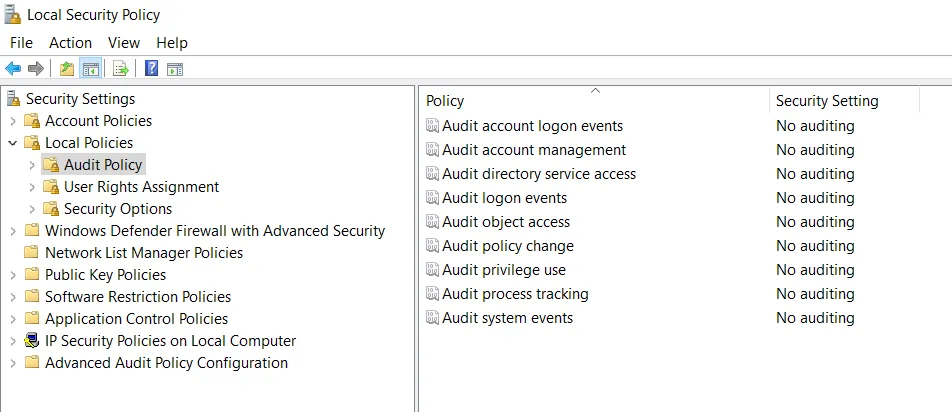
When open, look at the left-side column and navigate to Local Policies –> Audit Policy. You should now see the following screen, showing all available policies within the auditing category we just selected.
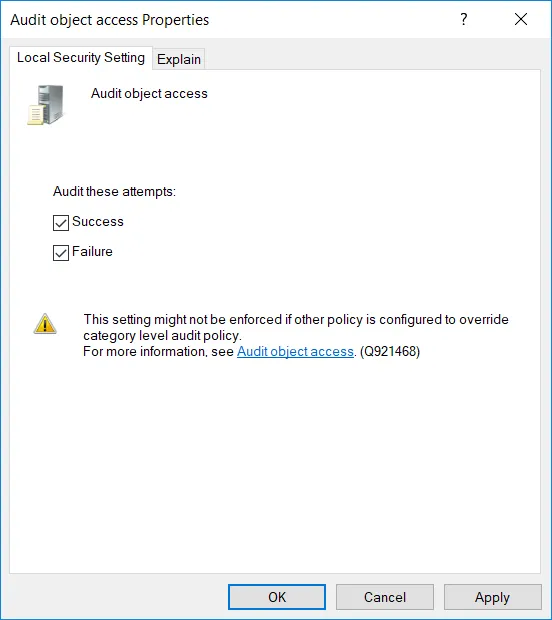
Right-click “Audit Object Access” and click “Properties.” Then check the two boxes listed for both “Success” and “Failure,” and click Apply and OK.
You now have the appropriate auditing policy active on your machine. Now, you need to specify what on your machine you want to monitor.
Enabling the File & Folder Access Security Audit
Even though we enabled Event ID 4663 though activating the Audit Object Access Policy, Windows still requires that you individually specify what directories and files you want this policy to target. For clients, usually this would entail shared drives, directories where important files are stored, and situation-specific folders.
For this example, I have decided to target my Desktop. Open up File Explorer and look to the left-side column for “Desktop” and right-click it to select “Properties.” Navigate to the “Security” tab and select “Advanced” near the bottom as shown below.
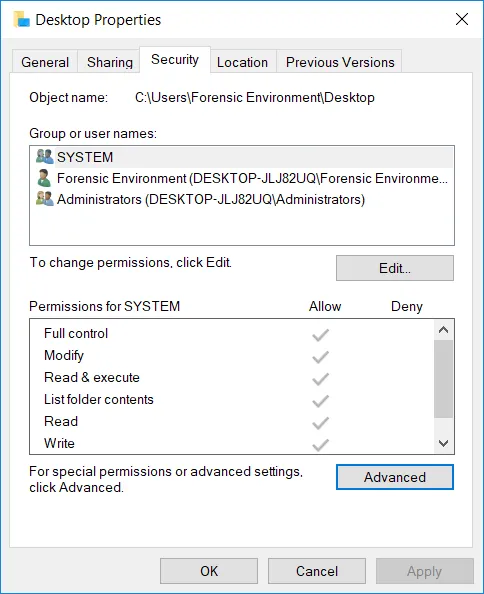
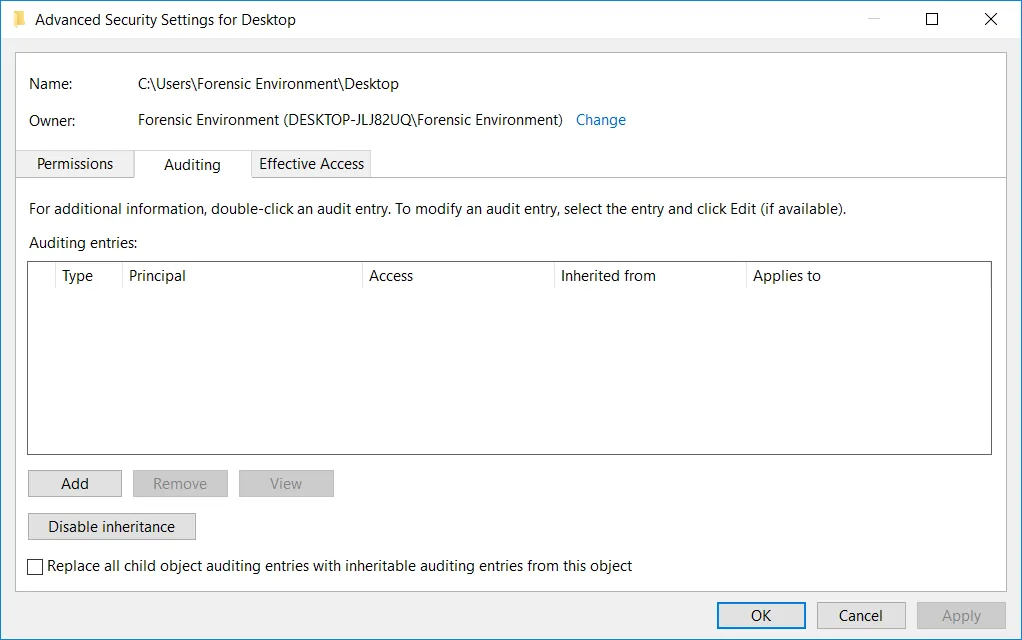
From here, go to the “Auditing” tab and select “Add” near the bottom. If you can not see the button, ensure you have Administrative privileges on the account you are using and that you press “Continue” if being prompted.
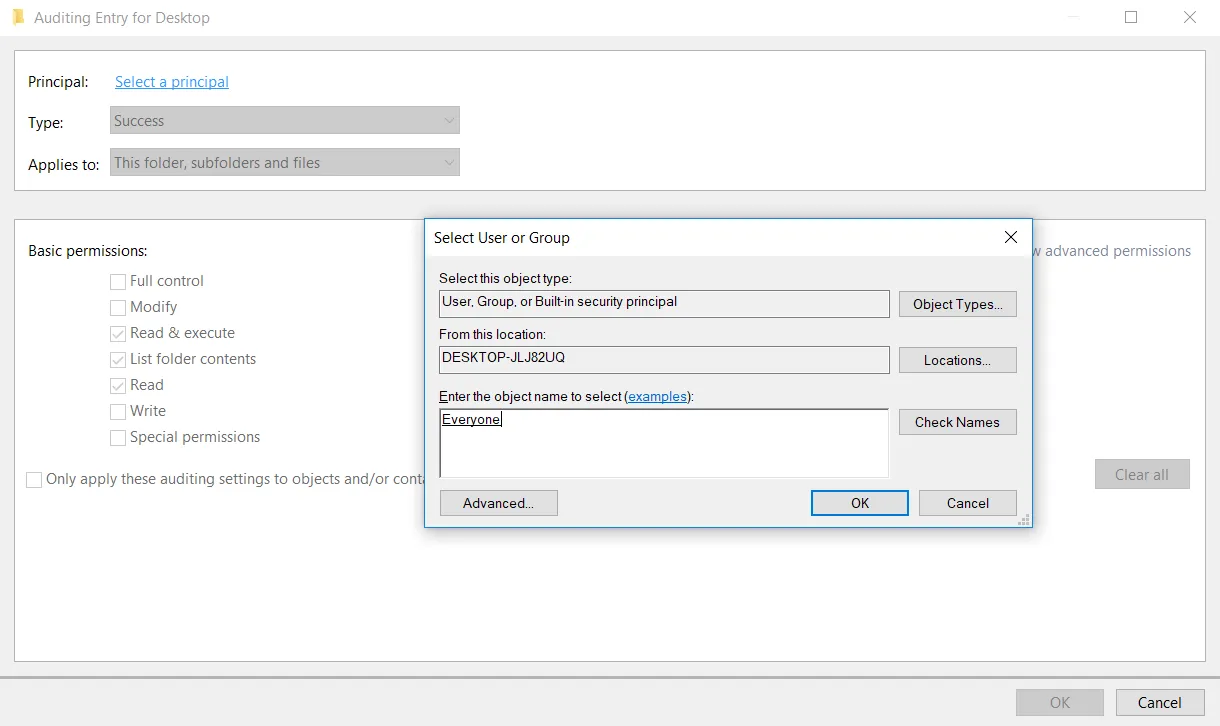
From the subsequent pop-up window, click “Select a Principal” at the top and enter “Everyone” as the object name as shown below, then press OK.
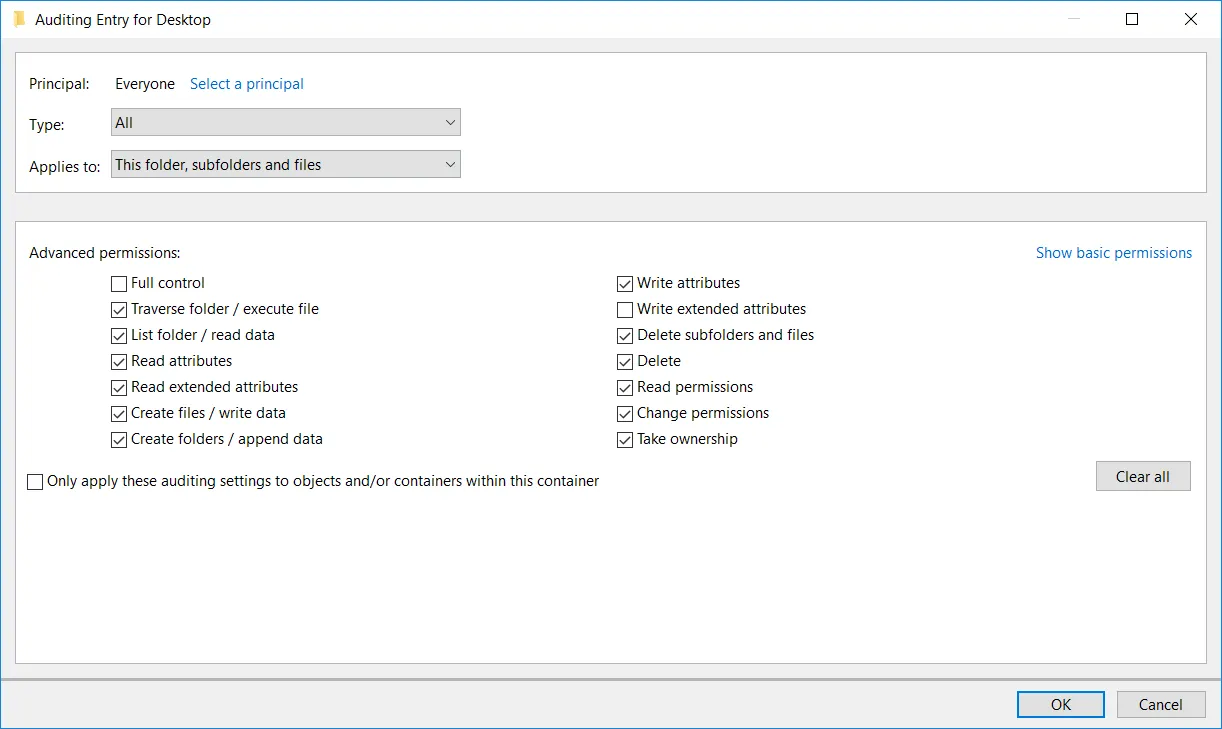
Under “Type” select the “All” option. Click “Show Advanced Permissions” and select the Permissions Objects that you wish to audit. When you are happy with your selections, press OK.
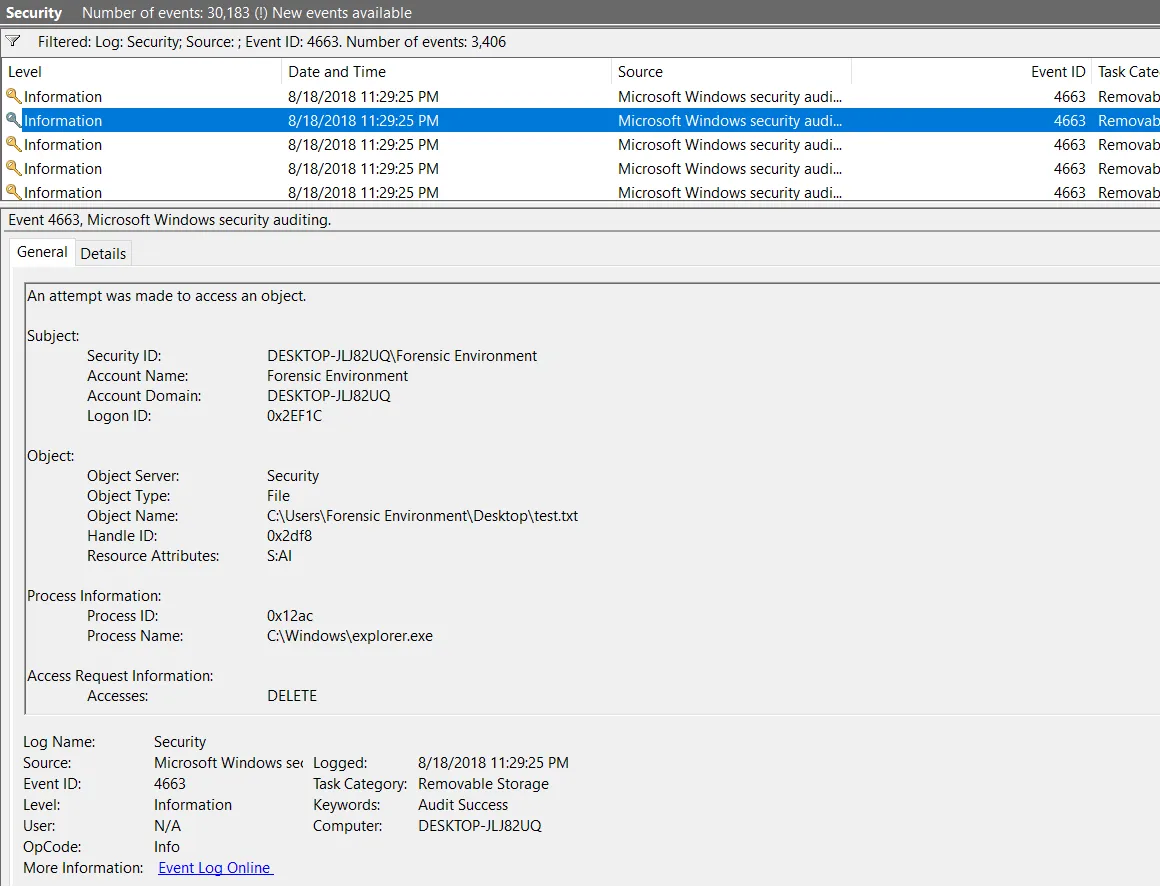
Navigate back to Event Viewer and look at your Security logs again. Filtering for Event ID 4663, you should now see an abundance of entries correlating to your Desktop. As a test, I created a text file on my desktop called test.txt and deleted the file from my machine. Looking through Event Viewer, I was able to see the log depicted below, telling me information such as the file path for the deleted file, the object type, the user who deleted it, and the access request made (in this case being “DELETE”).
Simple as that.
Your machine is now configured to audit the file & folder history of your Desktop, and can now be easily re-configured to monitor any part of your machine that you want. Now using Event Viewer, or even Kibana if you use ELK, you can easily look through the history of your computer for file system modifications or deletions.
As a warning, the Object Auditing Policy was turned off by default partly due to the volume of logs it generates on your system. I would check to see how much space you have allocated to Event Viewer logs on your machine, as well as ensuring that you are able to keep these logs from auto-deleting before the period of time you want them to.
For more information on Event ID 4663 and other associated IDs you may see as a product of your newly activated policy, I recommend this amazing resource.